VNF Templates and Appliances
Virtualized Network Functions (VNFs) refers to virtualized software applications which offers network services, for example routers, firewalls, load balancers.
Adding a VNF template from an URL
To create a VNF appliance, user needs to register a VNF template and add VNF settings.
Log in to the CloudStack UI as an administrator or end user.
In the left navigation, choose Images -> Templates
Click on the “Register template from URL” button.
Specify the “Template type” to “VNF”
Click on the OK button.
When the VNF template is registered successfully, you will see the template on the same page or under Network -> VNF templates.
For more information, see “Uploading Templates from a remote HTTP server”.
Updating a VM template to VNF template
Users are able to update an existing VM template, which is uploaded from HTTP server or local, or created from volume, to be a VNF template.
Log in to the CloudStack UI as an administrator or end user.
In the left navigation, choose Images -> Templates
Select the VM template you want to work with.
Go into System Preferences -> Network
Change the “Template type” to “VNF”
Click on the OK button.
Updating the VNF settings of a VNF template
Users need to add the VNF nics and VNF details of the VNF templates.
Log in to the CloudStack UI as an administrator or end user.
In the left navigation, choose Images -> Templates
Select the VNF template you want to work with.
Click on the “VNF settings” tab of the VNF template
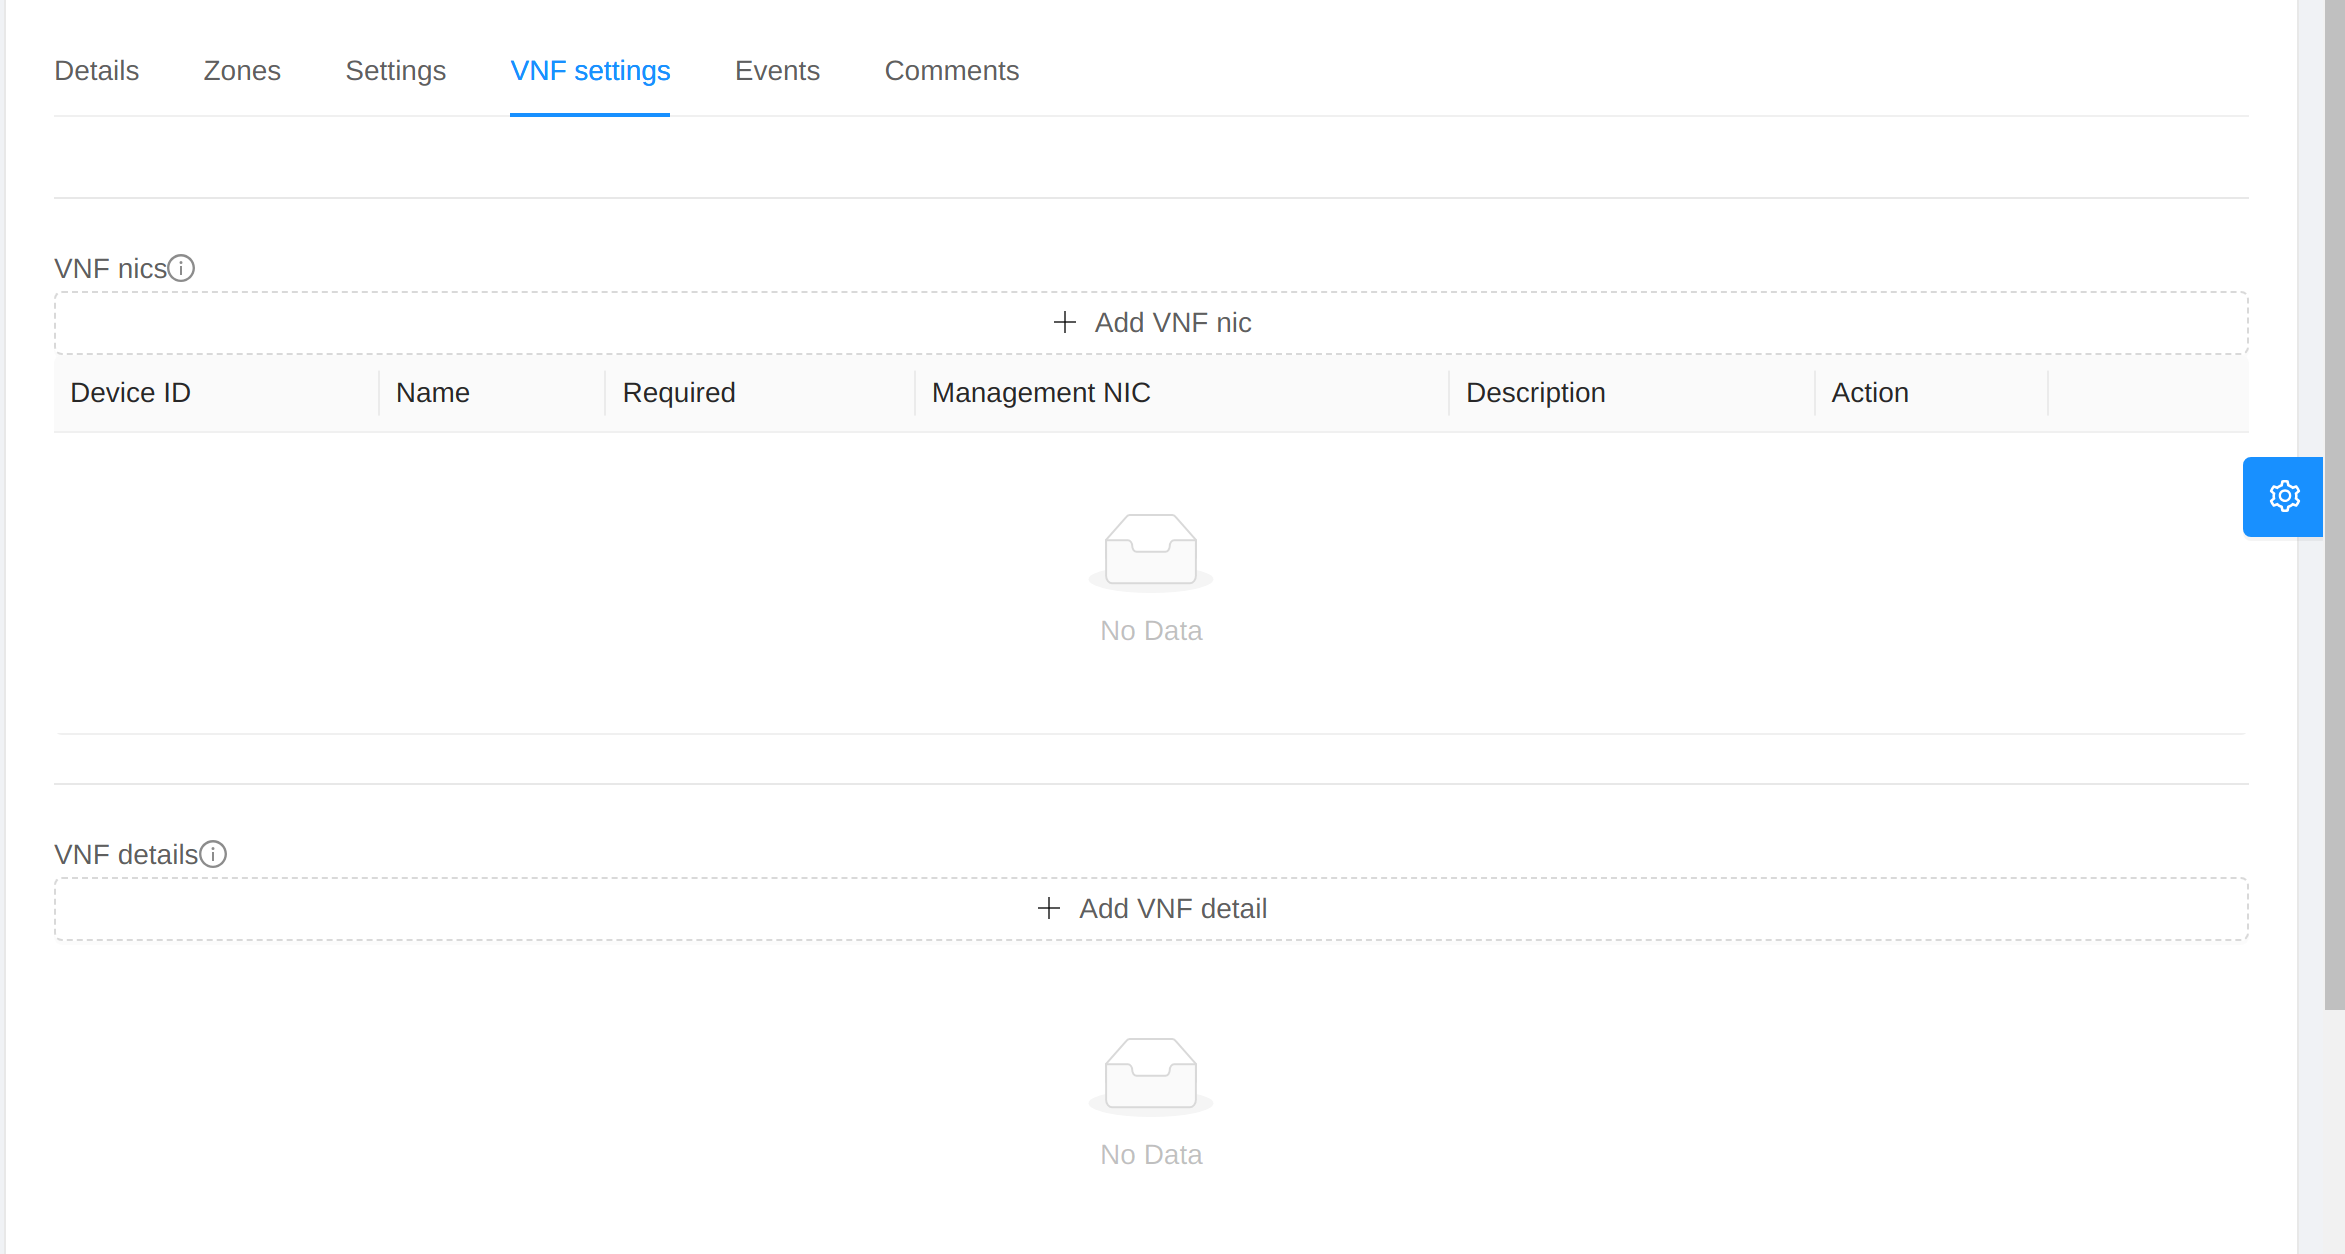
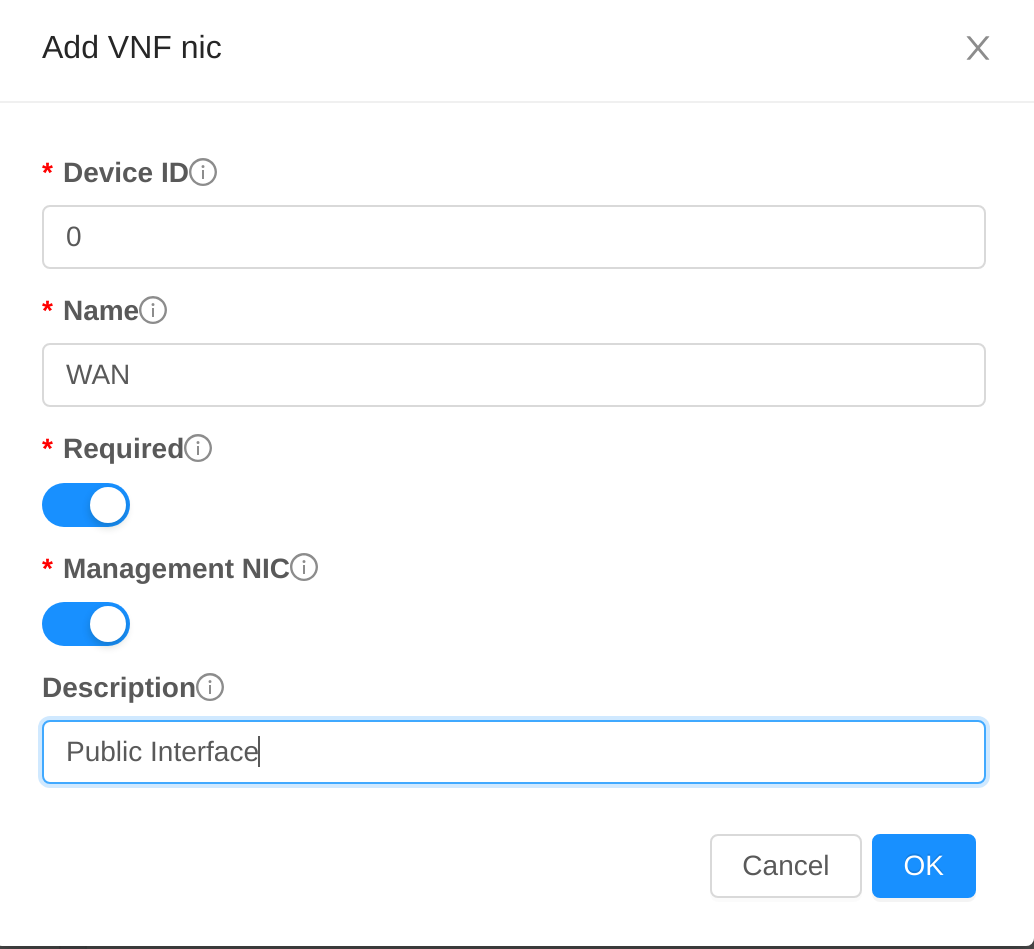
To add VNF nics, click on the “Add VNF nic” button
The following parameters are supported.
deviceid: The device ID of the VNF nic. The device id must be consecutive and start from 0.
name: The name of the VNF nic.
required: True if the VNF nic is required. Otherwise it is optional. It cannot be true if a preceding nic is optional.
management: True if the VNF nic is a management interface. False otherwise
description: The description of the VNF nic.
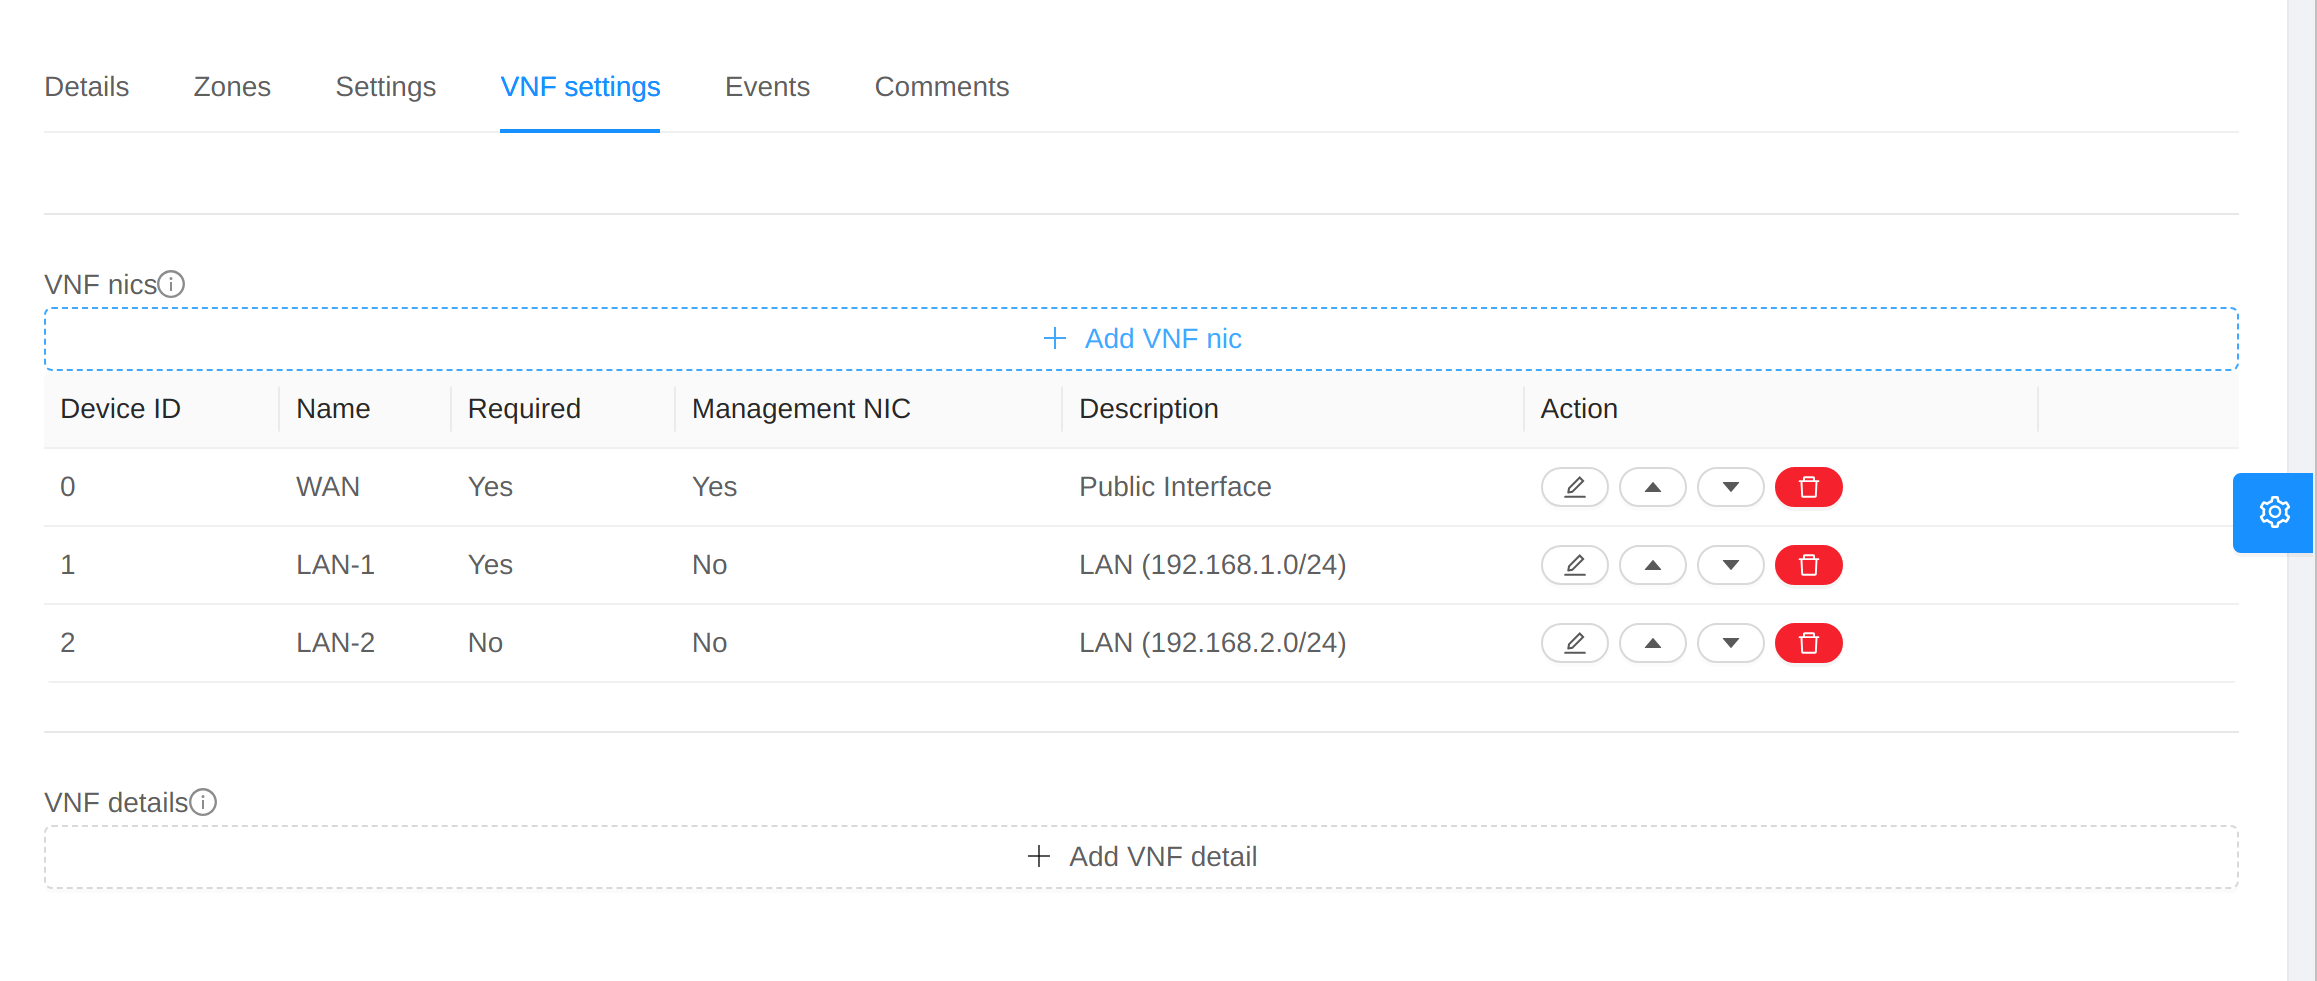
When VNF nics are added, users will see the list of VNF nics.
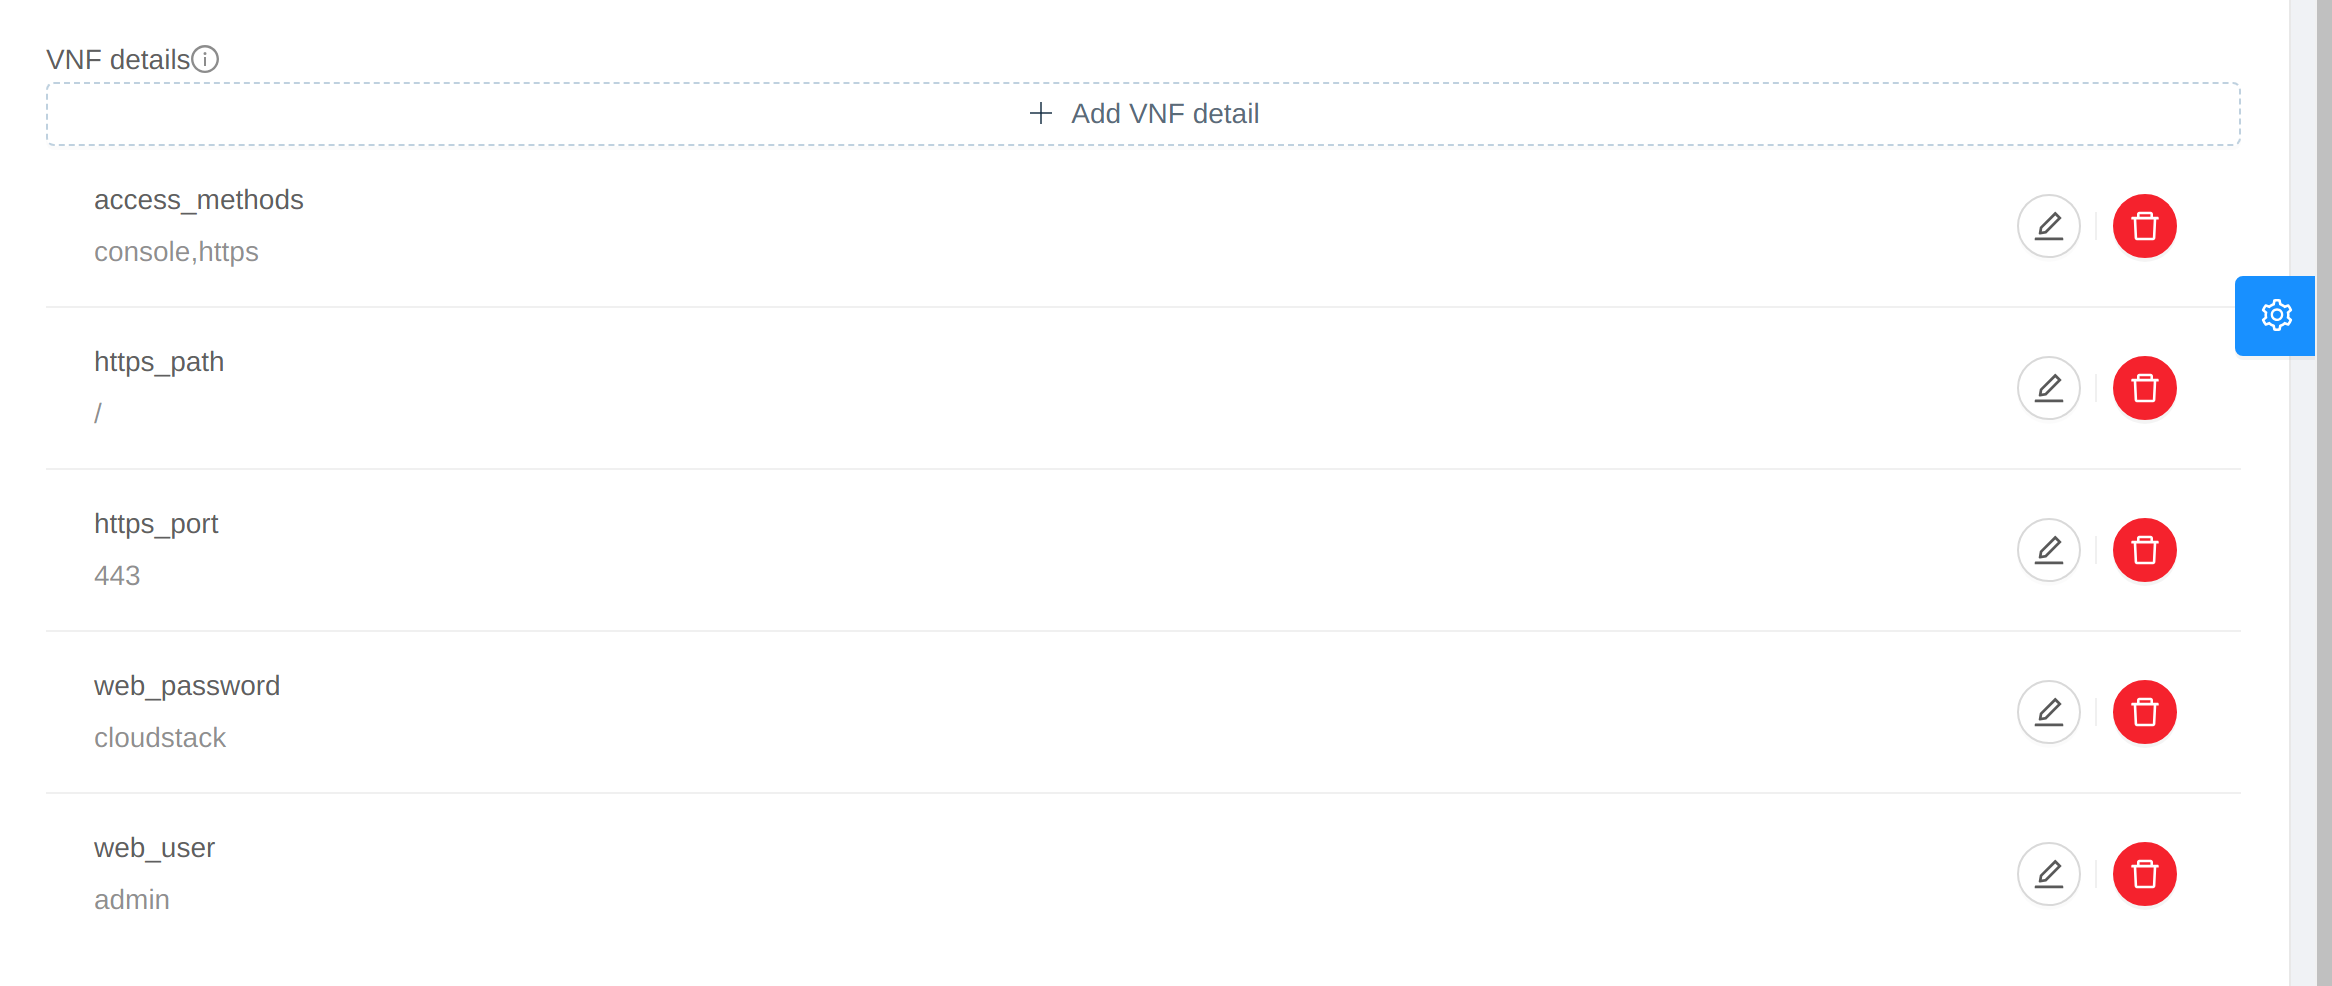
To add VNF details, click on the “Add VNF detail” button
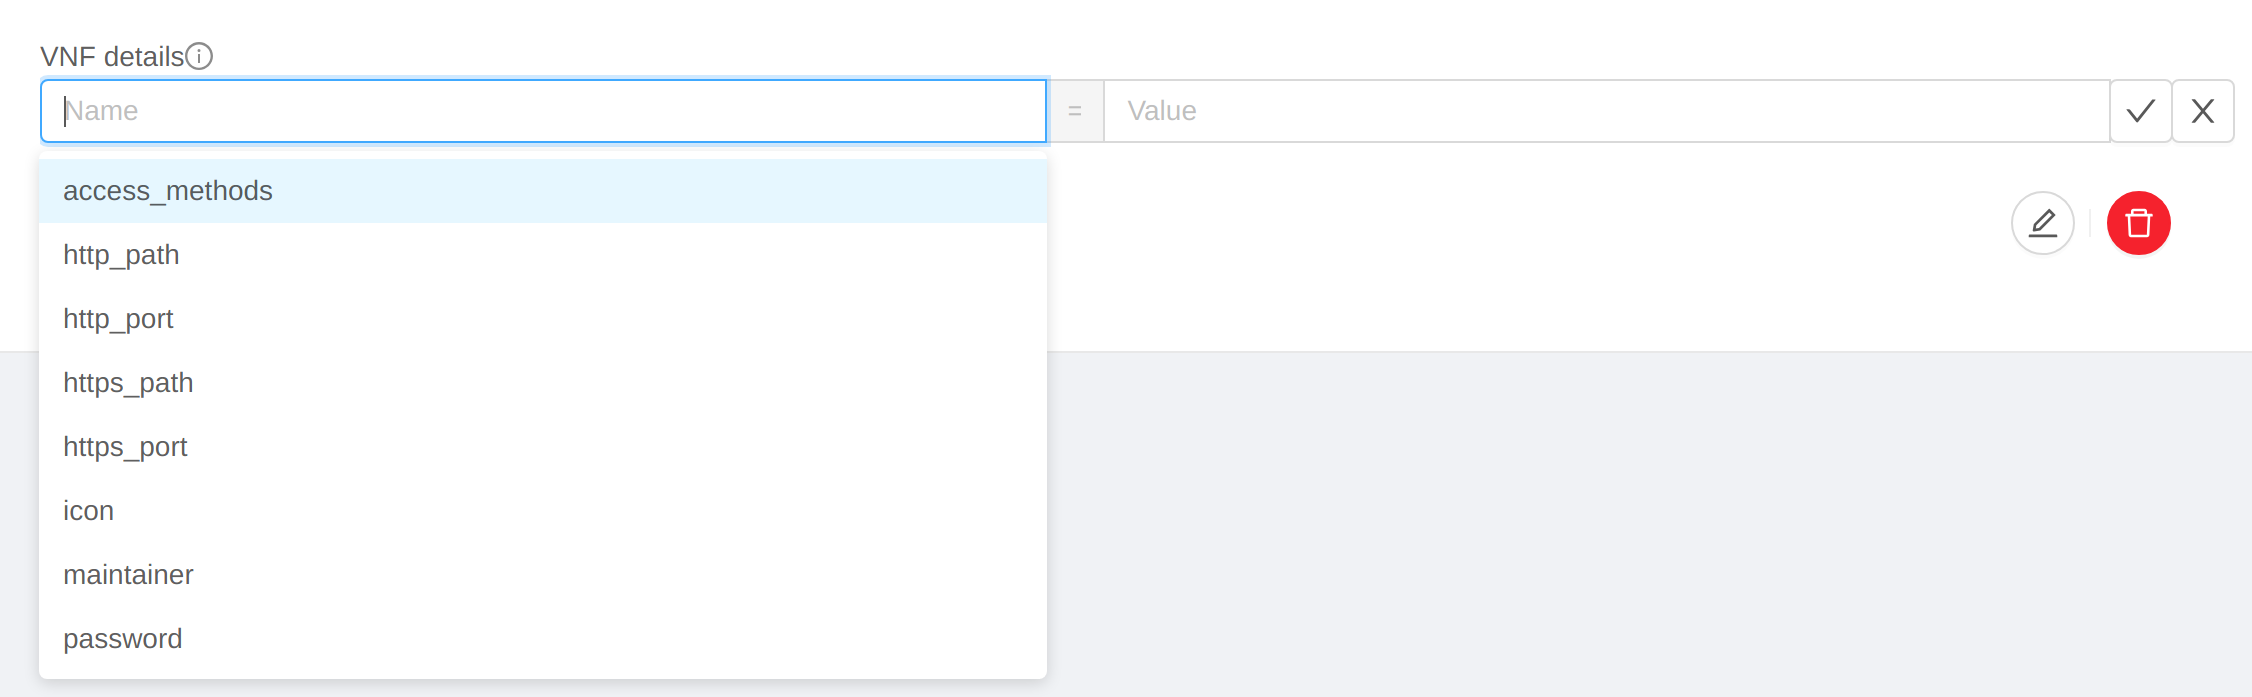
The following parameters are supported.
name: The name of the VNF detail. The valid values are: ACCESS_METHODS, USERNAME, PASSWORD, SSH_USER, SSH_PASSWORD, SSH_PORT, WEB_USER, WEB_PASSWORD, HTTP_PATH, HTTP_PORT, HTTPS_PATH, HTTPS_PORT, ICON, VERSION, VENDOR and MAINTAINER
value: The value of the VNF detail. If the name is access_methods, the valid values are: console, http, https, ssh-key, ssh-password
To edit or remove VNF details, click on the corresponding icon of each VNF detail.
Deploying VNF appliances
Log in to the CloudStack UI as an administrator or end user.
In the left navigation, choose Network -> VNF appliances
Click on the “Add VNF Appliance” button.
For more information, see “Creating VMs”.
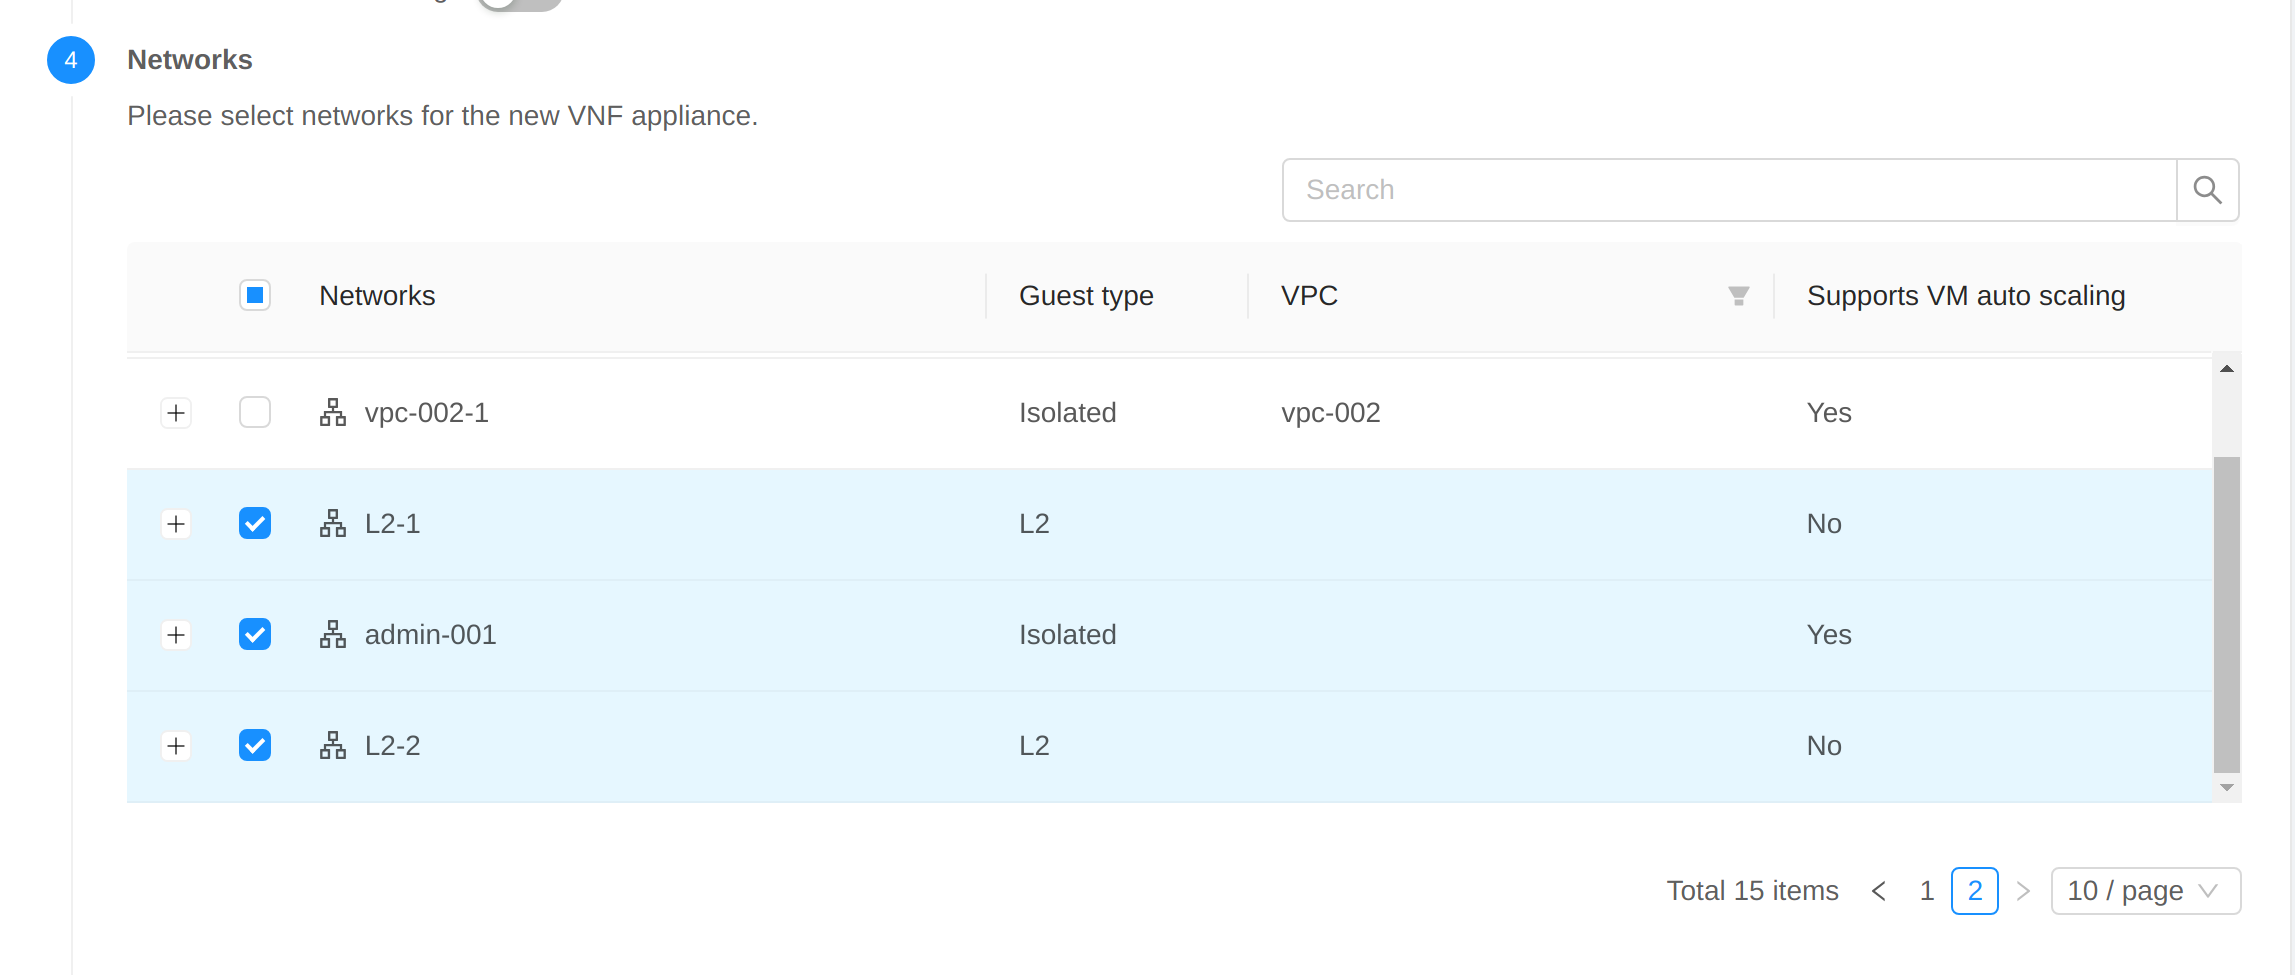
Choose the networks you want to add to the VNF appliance
In the “VNF nics” step, choose the network each VNF nic will use
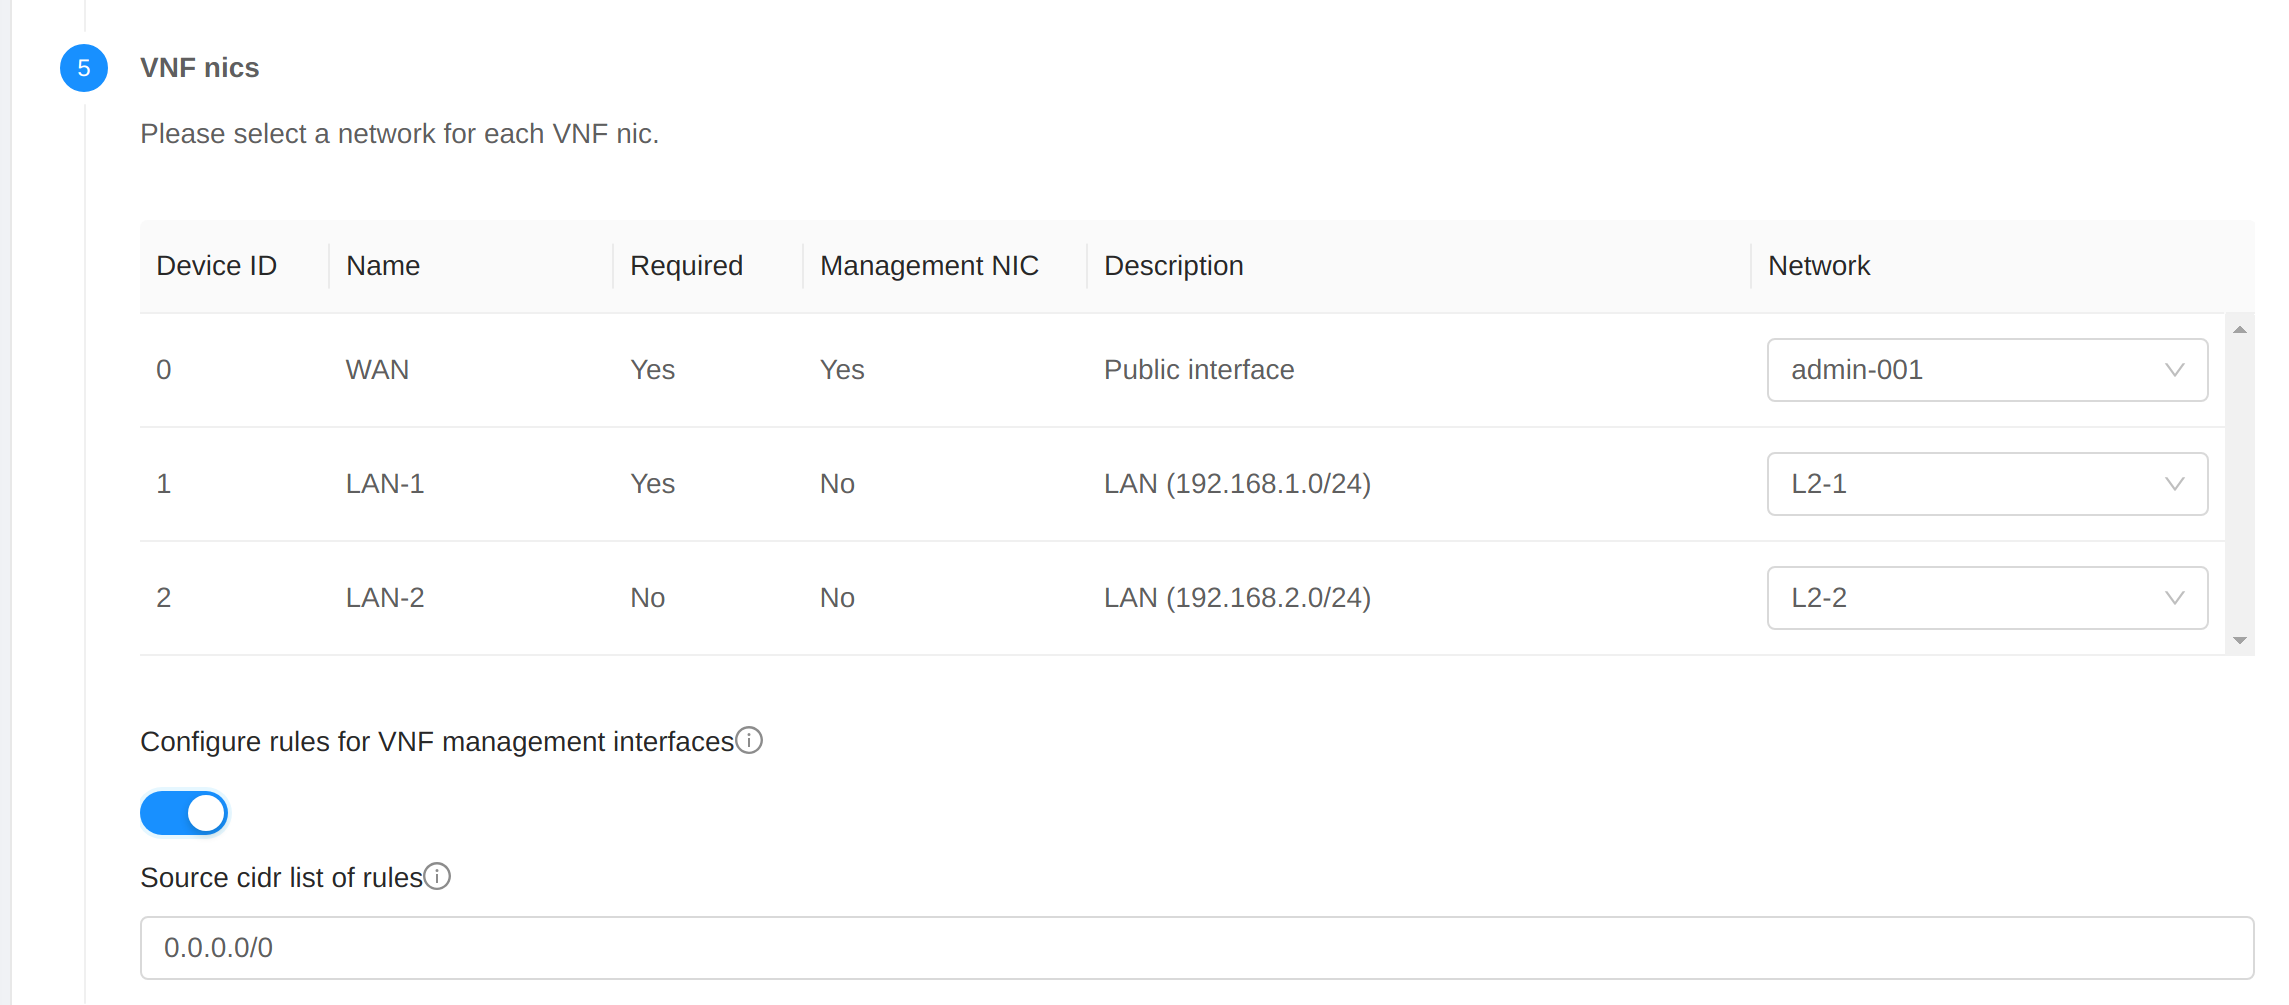
The following parameters are supported, if the management network is an Isolated network or Shared network with security groups.
Configure rules for VNF management interfaces. False by default.
Source cidr list of rules. It is The CIDR list to forward traffic from to the VNF management interface. Multiple entries must be separated by a single comma character (,). The default value is 0.0.0.0/0.
Note
The following network rules will be applied.
If management network is an isolated network, CloudStack will acquire a public IP, enable static nat on the VNF appliance, and create firewall rules to allow traffic to ssh/http/https ports based on access_methods in VNF template details.
If management network is a shared network with security groups, CloudStack will create a new security group with rules to allow traffic to ssh/http/https ports based on access_methods in VNF template details, and assign to the VNF appliance.
If management network is a L2 network, VPC tier or Shared network without security groups, no network rules will be configured.
Click on the “Launch VNF appliance” button
When the VNF appliance is deployed successfully, you will see the VNF appliance on the “VNF appliances” page.